How to relax your hair: essential, professional 7-step guide
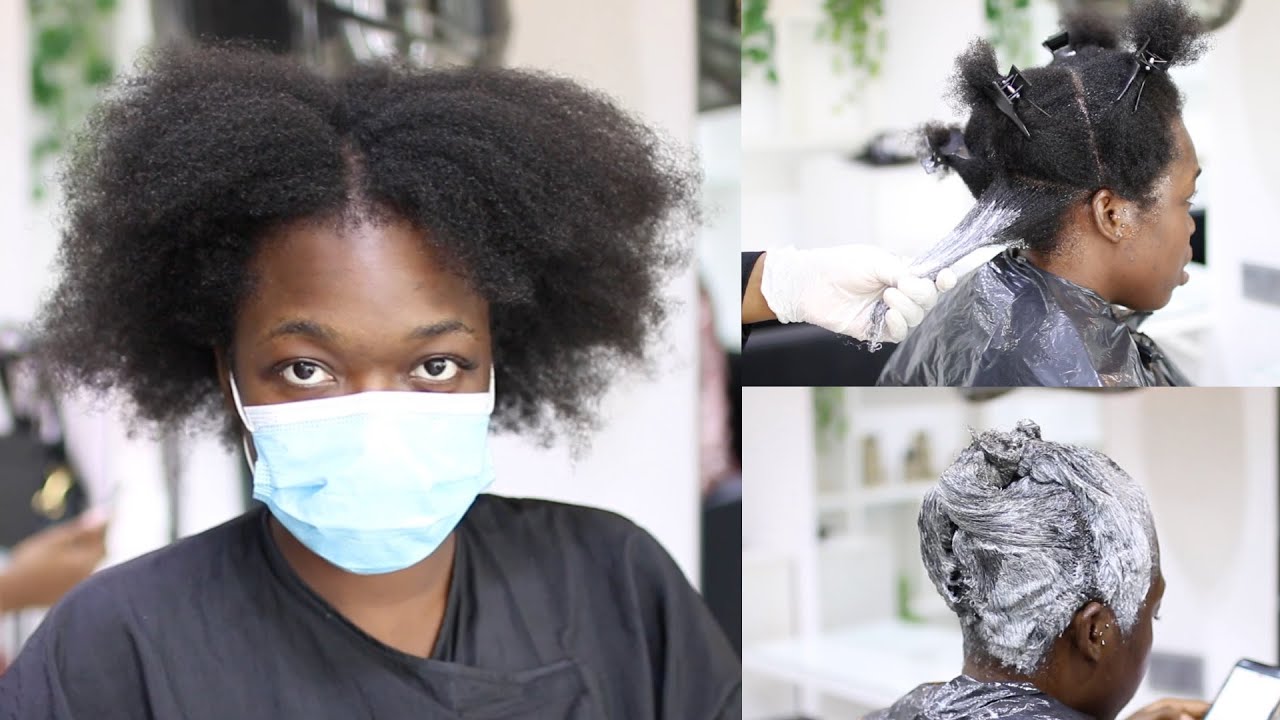
How to relax your hair naturally: safe methods, pro tips and aftercare
If you have textured or tightly coiled hair and want it smoother or more manageable, learning how to relax your hair naturally and safely can make a real difference to daily styling. Whether you are exploring non-chemical stretching techniques or considering a traditional chemical relaxer, this guide explains how to relax your hair step by step, what results to expect, how to reduce damage, and how to keep your scalp healthy. It is written for adults who are not experts and want clear, professional advice without the hype.
At its core, how to relax your hair is about loosening curl pattern to reduce shrinkage and tangles, creating a sleeker finish and shorter styling time. You can achieve this temporarily with heatless, gentle methods, or more permanently with chemical relaxers that break and reset bonds inside the hair. The best approach depends on your hair goals, lifestyle, and tolerance for maintenance. This article covers the pros and cons of each, with practical tips to help you choose wisely.
What does “relaxing” hair mean and how does it work?
To understand how to relax your hair effectively, it helps to know what’s happening inside each strand. Hair is made of keratin proteins linked by several types of bonds. The strongest are disulphide bonds, which help determine curl pattern. Chemical relaxers work by breaking some of these bonds and re-forming them while the hair is held straight, permanently loosening the curl. This is very different from temporary straightening achieved with rollers, banding, or a blow-dry, which only weakly rearranges hydrogen bonds that reset when the hair gets wet.
There are two common categories of chemical relaxers:


- Lye relaxers (sodium hydroxide): powerful and fast-acting. Often used in salons by experienced professionals.
- No-lye relaxers (calcium hydroxide mixed with guanidine carbonate, producing guanidine hydroxide): typically slower acting and sometimes less irritating to the scalp but can leave more mineral residue on the hair, which needs diligent conditioning.
Understanding this chemistry gives you realistic expectations for how to relax your hair and why aftercare is essential. Relaxed hair is usually more porous and can be more fragile, so it thrives on a balanced routine of strengthening and moisturising treatments.
Is how to relax your hair naturally possible without chemicals?
Yes, you can reduce shrinkage and smooth hair without altering its internal bonds. These methods won’t produce pin-straight hair and wash out with water, but they are gentler, flexible, and compatible with a healthy hair journey. If your aim is to explore how to relax your hair naturally first, try the following:
Heatless methods: how to relax your hair naturally with stretching
- Banding: After washing and conditioning, apply a leave-in conditioner and light oil or cream. Divide hair into sections and wrap snag-free bands down each section from root to tip. Air-dry. This stretches curls and reduces tangles.
- Roller sets or perm rods: Setting wet hair on large rollers is a classic way to smooth the cuticle and achieve big, soft curls or a blown-out look once dry.
- African threading: Wrapping thread around damp, conditioned hair sections stretches coils efficiently and can create sleek results without heat.
- Bantu-knot outs and twist-outs: Define curls while controlling shrinkage by styling damp hair into knots or twists and allowing it to dry fully before unraveling.
- Silk wrap on a roller set: After a roller set, wrap hair around the head with a satin scarf, then use very gentle, indirect heat or air-dry to “set” smoothness.
These techniques are excellent first steps when you are deciding how to relax your hair in a way that protects your natural pattern. They also help you test whether a sleeker look fits your daily routine.
Gentle smoothing aids (non-permanent)
- Conditioner layering: A rinse-out conditioner plus a leave-in and a light serum can smooth the cuticle, reduce frizz and increase glide.
- Blow-drying with tension: Use a low to medium setting with a concentrator nozzle, gently stretching hair with your hand or a brush as you dry.
- Silicone serums or heat protectants: These coat the hair, increase shine and reduce friction. Always use a heat protectant if using any heat.
None of these change your curl pattern permanently, but they are reliable methods for how to relax your hair naturally for a day or two with minimal risk.
When a chemical relaxer is the right choice
If your long-term goal is consistently straighter hair with minimal daily effort, then learning how to relax your hair using a chemical relaxer may be appropriate. The key is to approach it with realistic expectations and a strict safety routine. Not everyone is an ideal candidate. Avoid relaxers if you have active scalp conditions (eczema, psoriasis, open sores), recent scalp irritation, or severely damaged or over-processed hair. If in doubt, consult a professional stylist or a dermatologist.
Choosing the right formula and strength
- Type: Lye vs no-lye, as outlined above. Lye tends to be faster; no-lye can be gentler on the scalp but may cause more dryness if not conditioned well.
- Strength: Regular, mild, or super. Finer or looser textures tend to need mild or regular. Reserve super for very coarse, resistant hair—and only when truly necessary.
- Strand test: Always perform a strand test on a small, hidden section. This tells you how your hair responds, the time needed for desired loosening, and any adverse reactions before you commit.
The strand test is your rehearsal for how to relax your hair successfully. If the hair feels mushy, breaks, or over-straightens quickly, reconsider your formula or timing.
Step-by-step: how to relax your hair safely at home
While many people choose a salon for their first relaxer, you can learn how to relax your hair at home if you follow meticulous preparation, timing and aftercare. Here’s a comprehensive outline.
Before you start: preparation matters
- Wait time: Do not scratch, shampoo or irritate your scalp for at least 48–72 hours before relaxing to reduce burning and sensitivity.
- Detangle gently: Detangle thoroughly on dry hair using a wide-tooth comb to avoid tugging during application.
- Protect your skin: Apply a protective base (petroleum jelly or protective balm) around your hairline, ears and nape. Use ear protectors if available.
- Base your scalp: Particularly if you’re sensitive, apply a thin layer of protective base to the scalp through the parts.
- Section and clip: Divide hair into 4–6 sections for control. Pre-part within sections to speed up application.
- Gather tools: Timer, gloves, plastic applicator, neutralising shampoo (preferably with a colour indicator), protein treatment, moisturising conditioner, and a wide-tooth comb.
Good prep is half the battle in how to relax your hair without avoidable irritation or uneven results.
Application: new growth only
- Mix and start timer: Prepare the relaxer according to instructions. Start timing from the first touch on your hair.
- Apply to new growth: Work quickly but carefully, applying relaxer only to the curly new growth, never to previously relaxed lengths. Overlapping is the most common cause of breakage.
- Smooth, don’t overwork: Gently smooth the new growth in each section to encourage straightening. Do not rake through the lengths.
- Watch the clock: Stick closely to the strand-tested time. If you feel severe burning, rinse immediately.
Rinsing and neutralising: the non-negotiables
- Rinse thoroughly: Rinse with lukewarm water for several minutes, lifting sections to ensure no residue remains.
- Neutralising shampoo: Shampoo with a neutralising formula at least 2–3 times. If using a colour-indicating neutraliser, repeat until the lather stays the same colour, confirming the product is fully neutralised.
- Do not skip: Effective neutralisation is essential in how to relax your hair safely, stopping the chemical action and restoring pH balance.
Immediate aftercare: strengthen then soften
- Protein treatment: Apply a light-to-moderate protein treatment to reinforce the weakened hair structure. Rinse per instructions.
- Moisturising conditioner: Follow with a rich, moisturising conditioner to restore softness and flexibility.
- Detangle gently: Detangle with fingers and a wide-tooth comb from ends to roots.
- Air-dry or set: Air-dry in sections, roller set, or wrap. Avoid high heat right after a relaxer session.
This sequence—neutralise, strengthen, then moisturise—is a cornerstone of how to relax your hair while preserving its health.
Common mistakes to avoid
- Overlapping onto previously relaxed hair.
- Exceeding recommended processing time.
- Skipping the strand test.
- Relaxing hair that is already compromised (recent bleach or severe damage).
- Insufficient neutralising or rinsing.
- Scratching or shampooing just before application.
Maintenance: stretching, touch-ups and everyday care
Learning how to relax your hair isn’t just about day one. Long-term success depends on thoughtful maintenance tailored to your hair’s needs.
How often to touch up
Most people relax new growth every 8–12 weeks, sometimes longer. Touching up too soon increases the chance of overlapping and breakage. “Stretching” your relaxer (waiting a little longer) can be beneficial if you manage the line of demarcation carefully with protective styles and low manipulation.
Dealing with two textures
You’ll often have relaxed lengths and curly new growth. This area where they meet is fragile. Protective styles (roller sets, wraps, braid-outs), regular deep conditioning, and minimal heat help keep the blend smooth while you plan your next touch-up. A slightly “texlaxed” approach—intentionally under-processing for some texture—can also make the transition softer and reduce breakage.
Weekly routine
- Cleanse: Shampoo when needed, co-wash in between if it suits your scalp.
- Condition: Alternate between moisturising and light protein treatments to maintain balance.
- Seal: Use a serum or light oil on ends to reduce split ends and friction.
- Protect: Sleep with a satin bonnet or on a silk pillowcase to minimise friction.
- Trim: Regular micro-trims keep ends neat and prevent splits from travelling up the shaft.
Safety, scalp care and when to ask a professional
Safety must come first in any plan for how to relax your hair. If you experience a burning sensation that escalates, rinse immediately and neutralise. For chemical burns or significant irritation, follow medical advice; the NHS provides guidance on what to do after a chemical burn, including when to seek urgent care. If you have a history of contact dermatitis or sensitive skin, it may help to read about contact dermatitis symptoms and prevention and discuss your scalp health with a healthcare professional before relaxing.
It’s also wise to be aware of the wider context. For background on products and techniques, see the Hair relaxer overview on Wikipedia and this concise explanation of methods of hair straightening. These resources clarify differences between permanent relaxers and temporary smoothing methods, which can help you decide how to relax your hair in a way that matches your goals.
Finally, reading labels carefully helps you choose wisely. Product leaflets sometimes list numerous ingredients and steps; if you enjoy language clarity, you might appreciate this short note on useful synonyms for “numerous” when deciphering instructions. On multilingual leaflets, you may also see Roman numerals in diagrams or steps—this Roman numerals guide is a quick refresher that can come in handy. The more confidently you can parse instructions, the safer and more effective your routine for how to relax your hair will be.
Troubleshooting: signs of over-processing and how to fix them
Even with care, you may occasionally over-process or under-process. Here is how to relax your hair routine if something goes off track.
- Hair feels mushy, stretches excessively when wet, or breaks easily: Pause chemical services. Use a series of gentle protein treatments (not harsh or “hard” proteins) followed by moisturising masks. Reduce heat and handling. Trim if necessary.
- Hair is under-processed (wavier than desired): Consider a corrective relaxer only after at least 4–6 weeks, applied with extreme precision to the
